Discover the ideal frequency for using DIY face masks to achieve glowing, healthy skin.
How Often Should You Use DIY Face Masks?
Looking for a quick, affordable way to give your skin a boost? DIY face masks might just be the answer you’ve been searching for! But how often should you use them? Let’s dive into the benefits, determine your skin type, explore different frequencies, and of course, share some popular DIY face mask recipes. Get ready to pamper your skin and unleash the inner glow!
Understanding the Benefits of DIY Face Masks
Before we get into the nitty-gritty of mask frequencies, let’s take a moment to appreciate the wonders of DIY face masks. These little concoctions can be tailored to your skin’s unique needs, providing a plethora of benefits.
First and foremost, DIY masks often contain natural ingredients that can work wonders on your skin. Think of them as little pots of magic with no harmful chemicals or nasty additives. It’s like a spa treatment, right in the comfort of your own bathroom! Plus, different ingredients have different effects, so you can choose the ones that address your specific concerns.
But what exactly are these natural ingredients and what effects do they have on your skin? Let’s take a closer look:
Natural Ingredients and Their Effects on Skin
When it comes to DIY face mask ingredients, nature has your back. Let’s take a quick look at a few superstars and the awesome effects they can have on your skin:
- Aloe vera: This soothing ingredient is known for its hydrating properties. It can help calm inflammation, moisturize your skin, and leave it feeling refreshed and rejuvenated.
- Honey: Not only is honey delicious, but it’s also a great addition to your DIY face masks. It’s a natural humectant, meaning it helps to lock in moisture and keep your skin hydrated. It also has antibacterial properties, making it an excellent choice for fighting acne-causing bacteria.
- Turmeric: This vibrant spice is more than just a kitchen staple. It has powerful anti-inflammatory properties that can help reduce redness and swelling on your skin. Turmeric also contains antioxidants that can brighten your complexion, giving you a healthy, radiant glow.
- Oatmeal: If you’re looking for a gentle exfoliator, look no further than oatmeal. It can help remove dead skin cells, unclog pores, and soothe any irritation or redness. Oatmeal is also known for its moisturizing properties, leaving your skin feeling soft and supple.
As you can see, Mother Nature provides an array of options to nourish and revitalize your skin. So get ready to raid your kitchen cabinets and create your very own skincare haven!
Now, if you’re concerned about breaking the bank with your skincare routine, fear not! DIY face masks are not only kind to your skin, but also to your wallet. Forget about those expensive store-bought options – you can whip up a mask that’s just as effective (if not more!) using ingredients you already have at home. It’s a win-win situation!
Determining Your Skin Type
Knowing your skin type is essential when it comes to skincare. After all, different skin types have different needs. So, let’s take a moment to find out which category you fall into.
But first, let’s delve into the fascinating world of skin types and explore the identifying characteristics of each. By understanding your skin’s unique traits, you’ll be better equipped to give it the care it deserves.
Identifying Characteristics of Different Skin Types
There are generally four main skin types: oily, dry, combination, and sensitive. Let’s take a closer look at each one:
- Oily skin: The shine never seems to fade, and your skin is prone to breakouts. Oily skin is often caused by overactive sebaceous glands, which produce an excess amount of sebum. This can lead to clogged pores and a shiny complexion.
- Dry skin: Your skin often feels tight and flaky, especially after cleansing. Dry skin is characterized by a lack of natural oils, making it more susceptible to dehydration. It may appear dull and rough, and fine lines and wrinkles may be more noticeable.
- Combination skin: You’re a mix of both worlds, with an oily T-zone but drier cheeks. Combination skin is a unique blend of oily and dry characteristics. The T-zone, which includes the forehead, nose, and chin, tends to be oilier, while the cheeks and other areas may be drier.
- Sensitive skin: Your skin may react easily to certain ingredients or environmental factors. Sensitive skin is often prone to redness, irritation, and allergic reactions. It requires gentle care and products that are free from potential irritants.
Now that you have a better understanding of the different skin types, let’s explore how this knowledge can guide your DIY face mask adventures.
How Your Skin Type Affects Your Mask Usage
Once you’ve identified your skin type, it’s time to tailor your DIY face mask routine accordingly. Different skin types have different needs, so here are some tips to ensure your skin gets exactly what it craves:
For oily skin: Using a DIY face mask two to three times a week can help control excess oil and minimize breakouts. Just make sure to opt for ingredients that have oil-absorbing properties, like bentonite clay or witch hazel. These ingredients can help draw out impurities and leave your skin feeling refreshed and balanced.
If your skin tends to be dry: Aim for a once-a-week mask session. Look for hydrating ingredients such as avocado or yogurt to give your skin a supercharged hydration boost. These ingredients can replenish moisture and nourish your skin, leaving it feeling soft and supple.
Combination skin can be a bit tricky. As a general rule, applying a mask once or twice a week should do the trick. Focus on ingredients that can balance your skin – think tea tree oil or kaolin clay. These ingredients can help regulate oil production in the T-zone while providing hydration to the drier areas.
And if you have sensitive skin: Proceed with caution. Start with a patch test using a small amount of the mask on a small area of your skin to check for any reactions. If all goes well, you can use a gentle mask once a week and be on your way to glowing skin. Look for soothing ingredients like aloe vera or chamomile, which can help calm and nourish sensitive skin without causing irritation.
Remember, knowing your skin type is just the first step on your skincare journey. Experiment with different masks and ingredients to find what works best for you. Your skin will thank you for the extra care and attention!
Popular DIY Face Mask Recipes
Ready to dip your toes into the world of DIY beauty? Here are some tried-and-true face mask recipes to get you started:
Face masks are a great way to pamper yourself and give your skin some much-needed TLC. Whether you have dry, oily, or combination skin, there’s a DIY mask recipe out there that’s perfect for you. Not only are these masks easy to make, but they also use natural ingredients that you can find in your kitchen or local grocery store.
Hydrating Masks for Dry Skin
If you have dry skin, you know how important it is to keep it moisturized. These hydrating masks will give your skin the boost of hydration it needs, leaving it feeling soft and supple.
One popular recipe for a hydrating mask involves using mashed avocado, honey, plain yogurt, and olive oil. Avocado is rich in healthy fats that nourish the skin, while honey and yogurt provide moisture. Olive oil helps to lock in hydration and leaves your skin feeling smooth and refreshed.
To make this mask, simply mash one tablespoon of avocado, add one tablespoon of honey, one tablespoon of plain yogurt, and one teaspoon of olive oil. Mix all the ingredients together until you have a smooth paste. Apply the mask to clean, dry skin and leave it on for 15 minutes. Rinse off with warm water and pat your skin dry.
Oil-Control Masks for Oily Skin
If you struggle with oily skin, you know how frustrating it can be to deal with excess shine and breakouts. These oil-control masks will help to absorb excess oil and leave your skin looking matte and fresh.
A popular recipe for an oil-control mask involves using bentonite clay, apple cider vinegar, and tea tree oil. Bentonite clay is known for its ability to draw out impurities and control oil production. Apple cider vinegar helps to balance the skin’s pH levels, while tea tree oil has antibacterial properties that can help fight acne-causing bacteria.
To make this mask, mix one tablespoon of bentonite clay with one tablespoon of apple cider vinegar in a non-metallic bowl until you get a smooth paste. Add three drops of tea tree oil and stir well. Apply the mask to cleansed skin, avoiding the delicate eye area. Leave it on for 10-15 minutes, then rinse off with warm water.
Balancing Masks for Combination Skin
Combination skin can be tricky to deal with since it’s both oily and dry in different areas. These balancing masks will help to regulate oil production and provide hydration where needed, leaving your skin feeling balanced and refreshed.
A popular recipe for a balancing mask involves using green clay, honey, and aloe vera gel. Green clay helps to absorb excess oil and impurities, while honey provides moisture. Aloe vera gel is soothing and helps to calm any irritations or redness.
To make this mask, mix one tablespoon of green clay with one tablespoon of honey until well combined. Add one tablespoon of aloe vera gel and stir until you have a smooth paste. Apply the mask to clean, dry skin and leave it on for 15-20 minutes. Rinse off with lukewarm water and pat your skin dry.
Now that you have these easy and effective DIY face mask recipes, you can treat yourself to a spa-like experience right at home. Remember to always patch test any new ingredients before applying them to your face, and enjoy the benefits of these natural and nourishing masks!
Risks and Precautions When Using DIY Face Masks
While DIY face masks can be a game-changer for your skin, it’s important to be aware of the potential risks and take necessary precautions.

Potential Skin Irritations and Allergies
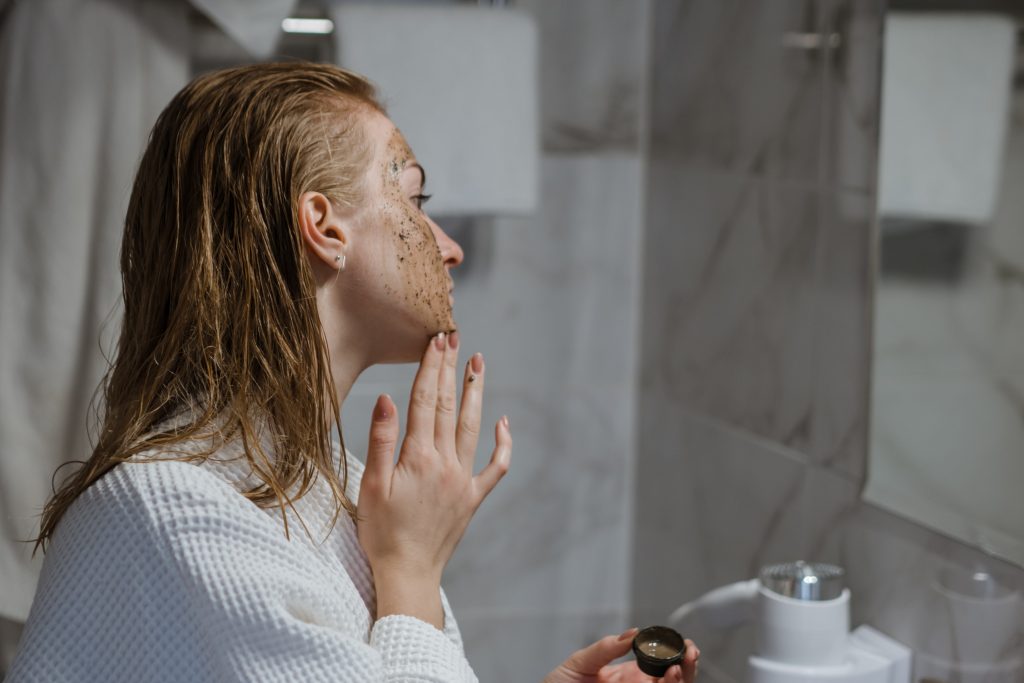
Just because an ingredient is natural doesn’t mean it’s automatically safe for everyone. Some people may experience skin irritations, allergies, or other adverse reactions to certain ingredients. That’s why it’s crucial to perform a patch test before using a new ingredient in your DIY mask. Apply a small amount of the mask to a small area of your skin, wait for 24 hours, and observe any reactions. If you notice redness, itching, or any discomfort, skip that ingredient and move on to something else. Safety first, folks!
Importance of Patch Testing New Ingredients
When creating your own masks, it’s easy to get adventurous and start adding all sorts of innovative ingredients. However, it’s vital to be cautious and introduce new ingredients gradually. This way, you can monitor how your skin reacts to each component and adjust your mask recipes accordingly. Remember, it’s not a race – it’s a skincare journey!
So, how often should you use DIY face masks? Well, it ultimately depends on your skin type, needs, and preferences. Listen to what your skin is telling you, indulge in a little self-care, and let the magic of DIY face masks bring out your natural beauty! Happy masking!
Hottest Reviews